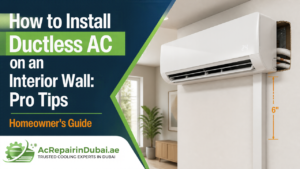
Window ACs are still common in Dubai, especially in older villas, staff accommodation, warehouses, and older buildings in Deira, Bur Dubai, Karama and Sharjah. They’re cheaper than split ACs, don’t need copper piping or gas work, and are easy to replace.
But a window AC must be installed correctly. The unit needs a slight backward tilt so water drains outside, it has to be fully supported, and it must be sealed so hot air and dust can’t get in. This guide explains how to install a window AC in a window or a wall opening, step by step. If you’d rather have it done safely by professionals, our AC installation service in Dubai covers window, split and ducted units.
Before You Start: Window or Wall?
There are two ways to install a window AC:
1. In a window opening. The unit sits in an existing window frame. This works best with windows that open vertically, but most Dubai homes have sliding or casement windows, so you’ll usually need a custom panel or frame to fill the gap around the unit.
2. Through a wall opening (wall sleeve). A rectangular hole is cut in an outside wall and the AC slides into a metal sleeve or frame. This is the most common method in Dubai villas and accommodations, because it’s more secure, seals better, and keeps the window free.
If your wall already has an old AC opening, installing a new unit is much easier and cheaper. Measure the old opening first and buy a unit that fits it.
Tools and Materials You’ll Need
- Window AC unit of the right size for the room (see sizing below)
- Mounting bracket or support frame, or a wall sleeve for wall installation
- Measuring tape and spirit level
- Drill, masonry bits and anchor bolts
- Screws and screwdriver
- Foam insulation strips or weather sealing
- Silicone sealant (outdoor grade)
- Drain pipe, if the water must be directed away from walkways
- Safety gloves and at least one helper
Important: Window ACs weigh between 25 and 60 kg. Always have two people lift and position the unit.
What Size Window AC Do You Need?
| Room Size | Recommended Window AC |
| Up to 150 sq ft | 1 ton |
| 150 – 220 sq ft | 1.5 ton |
| 220 – 300 sq ft | 2 ton |
Go one size up for west-facing rooms, top-floor rooms or rooms with a lot of glass. For a fuller size guide, see where to install a split AC and what size you need. The same sizing rules apply to window units.
How to Install a Window AC in a Wall (Step by Step)
Step 1: Choose the Right Spot
Pick an outside wall so the back of the unit can release heat outdoors. The opening should be:
- At least 75 cm to 1.5 m from the floor
- Close to a suitable power socket
- Away from curtains, furniture and direct obstructions
- Clear outside, with at least 50 cm of open space behind the unit for airflow
Step 2: Check the Wall and Get Approval
Cutting into a wall is a structural job. In block walls, a lintel (a support beam above the opening) is needed so the wall above doesn’t crack or sag. If you’re renting, get written approval from the landlord first. Many villa communities and buildings also have rules about changes to the outside of the property.
Step 3: Cut the Opening
Mark the size of the wall sleeve (not the AC itself) on the wall. Make it a little larger to allow for the frame. Cut the opening carefully with the right masonry tools, and install the lintel if required.
Step 4: Install the Wall Sleeve or Frame
Fit the metal sleeve or frame into the opening and fix it with anchor bolts. Fill gaps between the sleeve and the wall with mortar or expanding foam.
Step 5: Set the Correct Tilt (Very Important)
This is the most important step, and the one most people get wrong.
A window AC must be installed level from side to side but tilted slightly backward toward the outside. This lets the condensate water flow to the back of the unit and drain outdoors.
How much tilt? Usually about 5–10 mm lower at the back, or roughly 1 to 2 degrees. Always check the manufacturer’s manual, because some brands give an exact figure.
- Too little tilt: Water collects in the base, leaks into the room, and can cause damp walls and mould.
- Too much tilt: The internal parts may sit at the wrong angle and the unit can make noise.
- Tilted forward (toward the room): Water drips onto your floor. This is the most common mistake.
Use a spirit level on top of the unit to check both directions.
Step 6: Slide the AC Into the Sleeve
With a helper, lift the unit and slide it into the sleeve from inside the room. Make sure it sits fully on the base of the sleeve and doesn’t overhang without support.
Step 7: Support the Back of the Unit
Most of the weight of a window AC is at the back, where the compressor sits. If the wall is thin or the unit sticks out, install an outdoor support bracket under the back of the unit so it can’t tip or sag over time.
Step 8: Seal All Gaps
Seal every gap between the AC and the sleeve with foam strips. Then apply outdoor silicone around the outside edge. This keeps out:
- Hot outside air
- Dust and sand, which is a big issue in Dubai
- Rainwater
- Insects
Don’t seal over the side vents on the unit. Window ACs need those vents to pull in air for cooling the condenser.
Step 9: Arrange Drainage
If the unit drips onto a walkway, a neighbour’s area or a wall that will stain, attach a drain pipe to the outlet at the back and run it to a safe spot or drain.
Step 10: Connect Power and Test
Plug the unit directly into a properly rated wall socket. Larger window ACs draw a lot of current, so a dedicated circuit is best. Never use an extension cord or multi-plug.
Run the AC on cooling mode for 30 minutes and check:
- Cold air coming out
- No water leaking inside
- No rattling or loud vibration
- Water draining at the back
How to Install a Window AC in a Window
If you’re installing in a window instead of a wall:
1. Measure the window opening and compare it with the unit’s minimum and maximum width.
2. Build or buy a filler panel. For sliding windows, you’ll need a custom panel (acrylic, aluminium or wood) to close the space above or beside the unit.
3. Fix a support bracket to the outside wall below the window. Don’t rely on the window frame alone to hold the weight.
4. Place the unit on the sill and bracket, with the same slight backward tilt.
5. Secure the window so it can’t open and the unit can’t slide out.
6. Seal and insulate around the unit and the panel.
7. Connect power and test.
Window installations are less secure than wall installations, so they’re best for short-term use.
Can You Install a Window AC Inside the House?
You can install it from inside the house, and most installations are done this way for safety. But the back of the unit must always face outdoors.
A window AC cools the room by pulling heat out and blowing it outside. If the back of the unit faces another room, a corridor, or an enclosed balcony, it just moves the heat into that space. The unit will overheat, cooling will be poor, and the compressor can fail early.
If you have no outside wall available, a split AC or a portable AC with an exhaust hose is the better choice.
Common Window AC Installation Mistakes
- Tilting the unit forward, which causes water to drip inside
- No back support, so the unit sags or the sleeve bends over time
- Blocking side vents with sealant or foam
- Using an extension cord, which can overheat and cause a fire
- No lintel above a new wall opening, which leads to cracks in the wall
- Poor sealing, which lets dust, heat and insects inside
Window AC Installation Cost in Dubai
Labour-only window AC installation in Dubai usually costs AED 150–350 when an opening already exists. Cutting a new wall opening, fitting a sleeve or building a custom window panel will cost extra. See our full AC installation cost in Dubai guide for a price breakdown.
Frequently Asked Questions
What is the correct installation level for a window AC?
The unit should be level from side to side but tilted slightly backward, usually about 5–10 mm lower at the back, so water drains outside. Check your model’s manual for the exact angle.
Why is my window AC leaking water inside the room?
The most common reason is that the unit is level or tilted forward instead of slightly backward. A blocked drain hole or dirty base pan can also cause leaks.
Can I install a window AC in a sliding window?
Yes, but you’ll need a custom filler panel to close the gap, and an outside bracket to support the weight. A wall opening is usually more secure.
Do I need a dedicated power socket for a window AC?
It’s strongly recommended. Window ACs, especially 1.5 and 2 ton models, draw a lot of current. Plug them directly into a rated wall socket and never use an extension cord.
Can I install a window AC myself?
Fitting a unit into an existing opening is possible with a helper. Cutting a new wall opening, installing a lintel or working above ground floor should be left to professionals.
How long does window AC installation take?
Fitting into an existing opening takes 1–2 hours. A new wall opening with a sleeve can take half a day or more.
Get Your Window AC Installed Safely
A window AC is simple, but a poor installation leads to leaks, noise, wall damage and safety risks. Our technicians install window ACs across Dubai, including wall openings, sleeves, support brackets, sealing and electrical checks, with clear written quotes.